環境
- ImageMagick 6.9
やりたいこと
ImageMagickで画像の上下左右に余白を追加したい
オプションとしては -gravityでできる。重力。。?と思うが実際に画像結果を見ると実感できると思う。
色々できるのが便利だが、結構クセが強い。
ここではサンプル画像の変換結果を記載していく
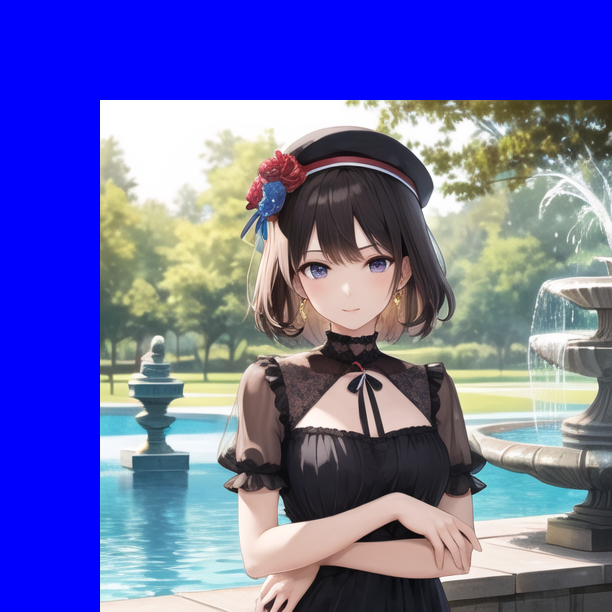
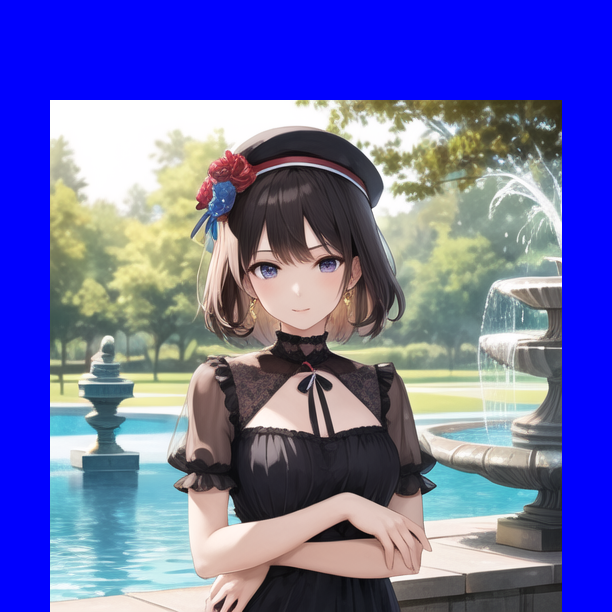
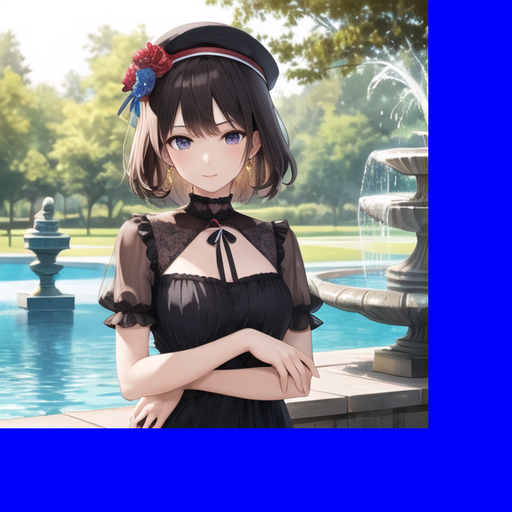
サンプル画像
512x512pxの画像

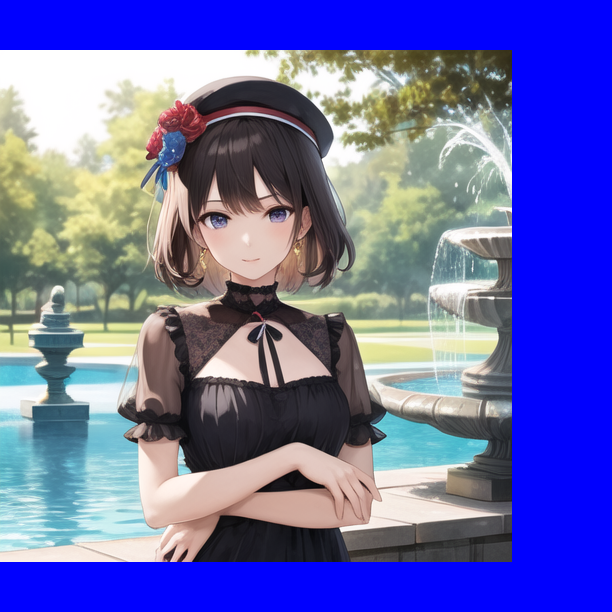
northwest
convert input.png -gravity northwest -background blue -extent 612x612 output_northwest.png
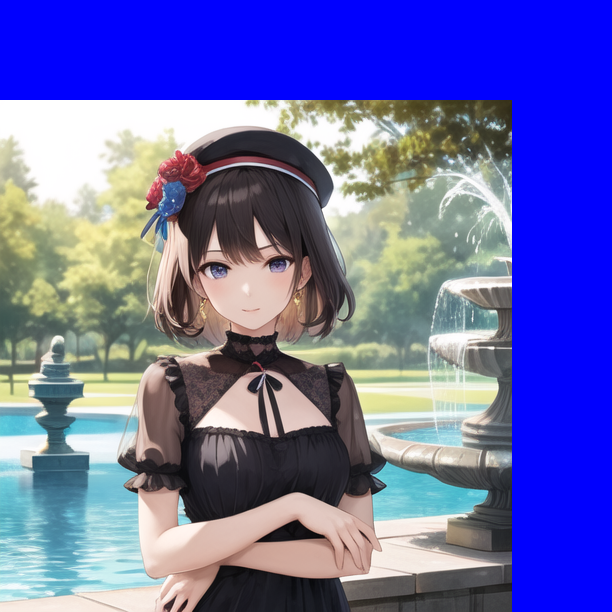
west
southwest
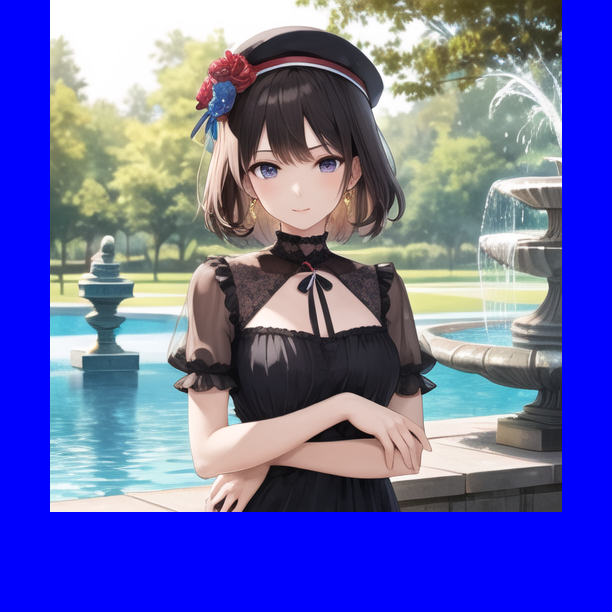
north
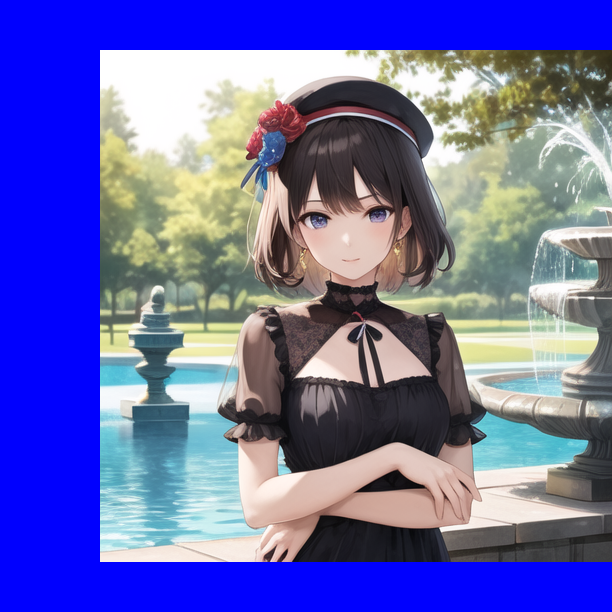
center

east
southeast
south
- 余白を付けるときのgravityオプションは、画像のどの方向に余白を追加するかを指定する機能。
- -gravityオプションは、-extentオプションやその他のgeometry引数を取るオプションと一緒に使われる。
- -extentオプションで指定したサイズに対して、-gravityオプションで指定した基準点に画像を配置する
- -geometryオプションでオフセットを指定することで、余白の幅を調整できる
画像サイズは同じまま余白を付けたい場合
元画像と解像度を一致させたい場合はgravityではなくborderを使う。
convert input.png -gravity SouthEast -background blue -splice 100x100 -resize 512x512 output.png
一見分かりづらいが512x512pxのままである。
検証シェルスクリプト
#!/bin/bash

image="input.png"

# 余白を追加する方向の配列
gravity=("northwest" "west" "southwest" "north" "center" "east" "southeast" "south")

# 画像の幅と高さを取得
width=$(identify -format "%w" "$image")
height=$(identify -format "%h" "$image")

# 余白の大きさ
margin=100

# 余白を追加した後の幅と高さ
new_width=$((width + margin))
new_height=$((height + margin))

# extentオプションの値
extent="${new_width}x${new_height}"

# 背景色
background="blue"

# forループで各方向に余白を追加する
for g in "${gravity[@]}"; do
  # 出力ファイル名
  output="output_${g}.png"
  # convertコマンドで画像変換
  # echo convert "$image" -gravity "$g" -background "$background" -extent "$extent" "$output"
  convert "$image" -gravity "$g" -background "$background" -extent "$extent" "$output"
done